Recipes > Dessert
Lemon Mousse Dairy Free ‘Cheesecake’
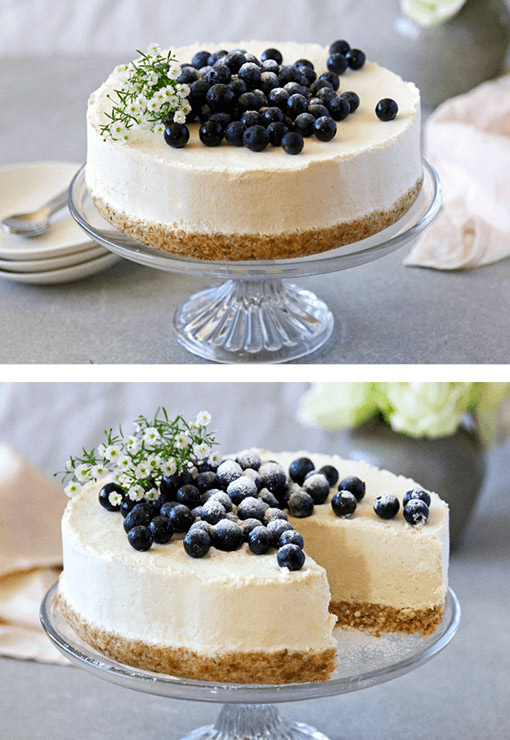
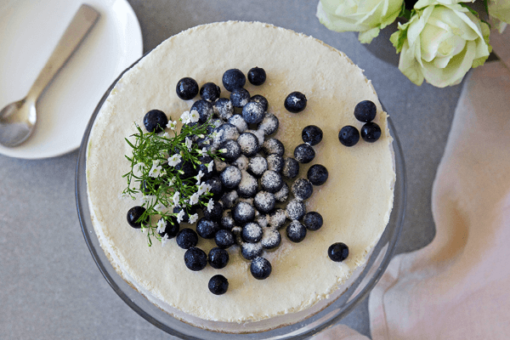
You won’t believe this gorgeous creamy and decadent cheesecake is plant-based and it’s rather nutritious for a dessert! The base is a decadent blend of natural nuts and coconut and the filling gives you lusciously creamy cashews and coconut yoghurt bursting with the tart zing of fresh lemons.
Ingredients
Ingredients
Cheesecake Base
1 ½ cups Alison’s Pantry Deluxe Natural Nuts
1 cup shredded coconut
¾ cup wholegrain oats
1/3 cup Alison’s Pantry Sultanas
Zest of 1 lemon, plus 2 tsp juice
1 tbsp coconut oil
¼ tsp salt
Cheesecake Filling
2 cups Alison’s Pantry Natural Cashews (pre-soaked, in water for at least 4 hours – or overnight in the fridge, then drained and well rinsed)
½ cup lemon juice
½ cup coconut oil, melted
½ cup caster sugar
1 tsp pure vanilla extract
¾ tsp salt
1 ¼ cups thick (Greek-style) coconut yoghurt
Zest of 4 lemons
1 x 400g can chickpeas
Cheesecake Topping
Berries of your choice
Instructions
Instructions
Line the base and sides of a 23cm tin with baking paper.
Add the base ingredients to a food processor and whizz until you have a nice fine crumb – tilting the processor sometimes helps it blend better. It will probably need a good couple of minutes, process until the mixture gums a bit when you press it between your fingers. Tip out into the prepared tin and flatten into an even layer.
Add to the food processor prepared cashews, lemon juice, coconut oil, sugar, vanilla and salt. Whizz on high for a few minutes (scrape down the sides once or twice) until the mixture silky smooth – it may take a while. Scrape the mixture into a large mixing bowl.
Add the coconut yoghurt and lemon zest to the bowl, and fold to combine.
Drain the tin of chickpeas so the liquid (aquafaba) goes straight into another medium mixing bowl (keep the chickpeas to use in another recipe). Using an electric beater, beat on high for a good few minutes, until the mixture is super thick and voluminous, white and fluffy, and forms very stiff peaks. Add ¼ cup of the aquafaba fluff to the cashew mixture and fold with a spatula to aerate it. Then add about three-quarters of the remaining fluff and fold in to evenly combine (if you add the whole lot that’s fine, it will just be a very light cheesecake texture).
Scrape the lemon mixture into the tin on top of the base and smooth out. Cover tightly and freeze for 4-5 hours, or overnight.
To serve, remove from the freezer about half an hour beforehand. (If you need to wait longer than that you can put it in the fridge it will keep its shape perfectly). Pull off the paper and adorn the top with berries of your choice. Dust with icing sugar. Use a hot sharp knife to cut into slices.
Chelsea’s helpful tips
You can freeze the cheesecake (unadorned) for up to a month – just make sure it’s tightly sealed so it doesn’t taste like the freezer.
If you have a bullet/high speed blender, you can use this for the cashew mixture as it will give a silkier texture. You may need to do the mixture in two lots, though.
Once it’s been frozen, it will keep covered in the fridge for a few days. You don’t have to store it in the freezer.
If you can’t find fresh berries, some half-defrosted blueberries will work fine.